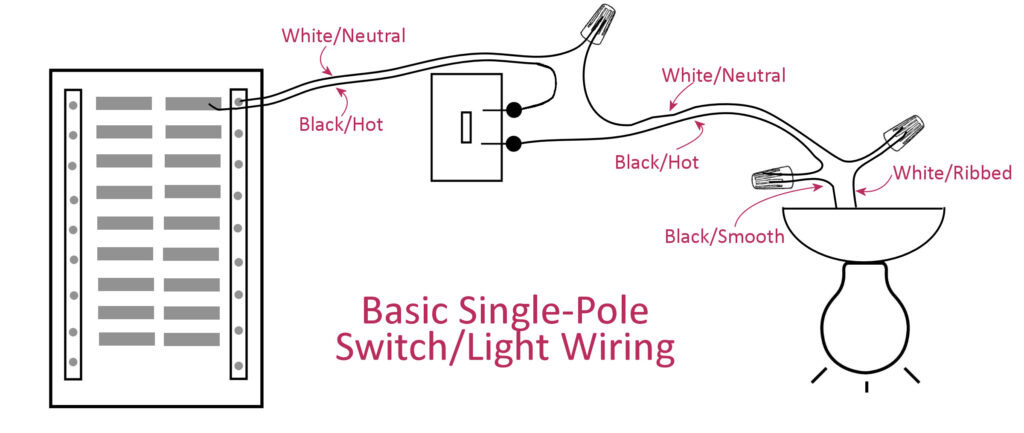
Understanding Single Pole Switches. A single pole switch is one of the simplest types of switches you can find in your home. It serves the basic function of controlling a light an electrical device from one location. This means when you flip the switch, it either completes the circuit to turn on the light or breaks the circuit to turn it off.
Common Uses in Homes, Single pole switches are commonly used in residential settings for basic light fixtures, such as ceiling lights, hallway lights, or table lamps. They are often installed in areas where you need a straightforward on/off operation without complicated multi-way configurations.

Basic Components
The main components of a single pole switch include:
- Switch Body: The physical casing that houses the internal mechanism.
- Screw Terminals: The points where you connect your wires. Usually, there are two screws on the side for hot wires and a third for the ground wire.
- Cover Plate: This is what you see on the wall, giving your switch a finished look.
2. Gathering Necessary Tools
Before you get started with wiring, it’s essential to gather all the required tools for a smooth installation:
Essential Tools List
- Screwdriver Set: A flathead and Phillips screwdriver will be needed.
- Wire Stripper: Essential for preparing the wires.
- Voltage Tester: To check for live wires.
- Pliers: For twisting and securing wires.
Safety Gear Required
- Safety Glasses: Protect your eyes while working.
- Gloves: To ensure a firm grip and protect your hands from sharp wires.
- Non-slip Shoes: A safety precaution that keeps you stable while working.
3. Safety First: Precaution Steps
Before you start working on electrical wiring, proper safety measures must be taken.
Turning Off the Power
Always turn off the circuit breaker that controls the switch you’re working on. This avoids the risk of electric shock.
Testing for Live Wires
Once you believe the power is off, use your voltage tester on the wires. If there’s no light on the tester, you’ve taken the right steps to ensure safety. If it lights up, turn off the power again!
4. Removing the Old Switch
Let’s get to the nitty-gritty of it all!
Unscrewing the Cover Plate
Start by removing the screws that hold the cover plate on the switch. A gentle pull will remove the plate, exposing the switch itself.
Disconnecting the Wires
Once you can see the switch and wiring, carefully unscrew the terminals to disconnect the wires. Make a note of where each wire connects, or take a picture for reference. This will be helpful when installing the new switch!

5. Wiring the New Single Pole Switch
It’s time to bring in the new switch!
Identifying the Screw Terminals
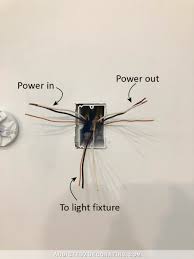
You’ll notice the new switch has similar screw terminals. Typically, one terminal will be labeled “Line” or “Hot,” and the other will be “Load.”
Connecting the Ground Wire
Connect the ground wire to the green terminal on the switch. If your switch does not have a green ground screw, you may need to attach it to the metal box that houses the switch.
6. Securing the Switch and Testing
With everything wired up, let’s wrap it up!
Screwing in the New Switch
Carefully tuck the wires back into the electrical box. Make sure they are neat to avoid crimping. Secure your new switch with screws.
Reattaching the Cover Plate
Replace the cover plate and screw it back into place. This protects the wiring and gives a finished look to your work.
Testing the Switch Functionality
Now, turn the power back on at the breaker. Flip the new switch to see if the light turns on. If it does, celebrate! If not, you may need to go back and check your connections.
7. Troubleshooting Common Issues
Sometimes, things may not go as planned. Here are some common issues and quick fixes:
Flickering Lights
If your lights flicker, check if the wires are secured tightly to the terminals. Loose connections can cause this annoyance.
Switch Not Working
Confirm that the power is on and the circuit breaker hasn’t tripped. If it still doesn’t work, double-check the wiring.
Circuit Breaker Trips
A tripped circuit breaker points to a short circuit. In this case, turn off the breaker, check for exposed wires, and repair them as needed.
Conclusion
Wiring a single pole switch might seem intimidating, but by following these simple tips, you’ll be well on your way to a successful installation. Remember, safety should always be your number one priority. Happy wiring!
Read More: https://thoughtsvista.com/


